An introduction to scanners
A scanner is a device that converts images to a digital file and you can use with your computer. There are many different types of scanners: Film scanners, Flatbed scanners, and Drum scanners
Dedicated Film scanners
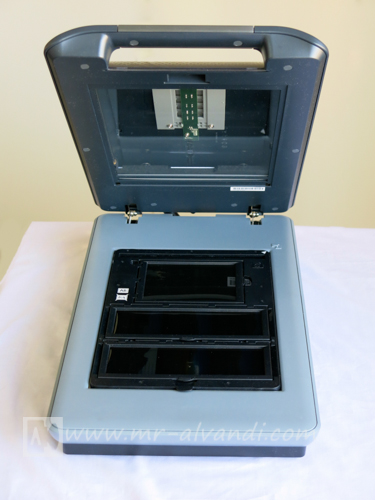
This type of scanner is sometimes called a slide or transparency scanner. They are specifically designed for scanning film, usually 35mm slides or negatives, but some of the more expensive ones can also scan medium and large format film. These scanners work by passing a highly focused beam of light through the film and reading the intensity and color of the light that emerges.
Flatbed scanners
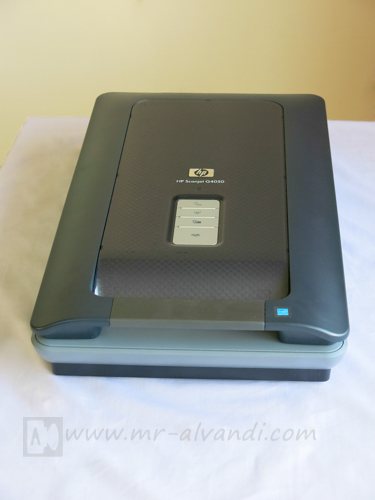
This type of scanner is sometimes called a reflective scanner. They are designed for scanning prints or other flat, opaque materials. These scanners work by shining white light onto the object and reading the intensity and color of the light that is reflected from it. Some Flatbed scanners have available transparency scanning adapters, but in most cases these are not as well suited to scanning film as a dedicated film scanner.
Drum scanners
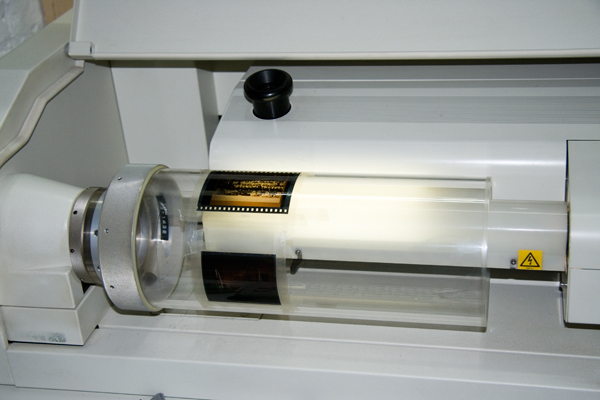
These professional devices are pretty much out of the reach of the individual photographer. To use a Drum scanner, the original is taped to a rotating clear plastic Drum and scanned as the Drum rotates. Drum scans have the highest quality but are labor intensive and very expensive.
CCDs vs. Photomultipliers
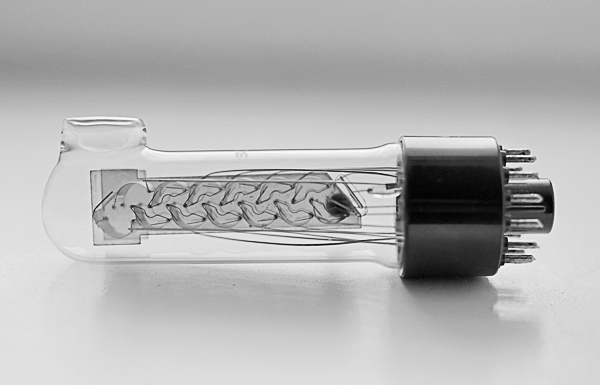
Most dedicated film scanners, Flatbed scanners, use light sensing elements called CCDs (Charge Coupled Devices) to measure light. CCDs are relatively inexpensive, compact, and efficient. Most high end Drum scanners use photomultiplier tubes to measure light. Photomultipliers, while larger and more expensive to design around, do offer superior dynamic range. Thus a scanner that uses photomultiplier tubes can extract more detail from very dark shadow areas of a transparency. CCD scanners, while steadily improving in this area, are still prone to losing detail in deep shadow areas.
Scanner characteristics
There are many different types of scanners, each one has its own characteristics. The quality of the digital images, can obtain from a scanner depend on many factors:
Resolution
Resolution is a measurement of how many pixels a scanner can sample in a given image. Resolution is measured by a grid. Think of a chessboard, with eight squares along each side. The resolution of that chessboard would be 8 x 8. If the chessboard had 300 squares along each side, its resolution would be 300 x 300. (the typical resolution of an inexpensive desktop scanner today).
That scanner samples a grid of 300 x 300 pixels for every square inch of the image, and sends a total of 90,000 readings per square inch back to the computer. With a higher resolution, you get more readings; with a lower resolution, fewer readings. Generally, higher resolution scanners cost more and produce better results.
There are two ways of measuring resolution:
1– Optical Resolution
A scanner's optical resolution is determined by how many pixels it can actually see. For example, a typical Flatbed scanner will use a scanning head with 300 sensors per inch, so it can sample 300 dots per inch (dpi) in one direction. To scan in the other direction, it will move the scanning head along the page, stopping 300 times per inch, so it can scan 300 dpi in the other direction as well. This scanner would have an optical resolution of 300 x 300 dpi. Some manufacturers stop the scanning head more frequently as it moves down the page, so their machines have resolutions of 300 x 600 dpi or 300x1200 dpi.
Don't be fooled; what really counts is the smallest number in the grid. You can't get more detail by scanning more frequently in only one direction.
2– Interpolated Resolution
The other thing to watch out for is claims about interpolated (or enhanced) resolution. Unlike optical resolution, which measures how many pixels the scanner can see, interpolated resolution measures how many pixels the scanner can guess at. Through a process called interpolation, the scanner turns a 300 x 300 dpi scan into a 600 x 600 dpi scan by inserting new pixels in between the old ones, and guessing at what light reading it would have sampled in that spot had it been there. This process almost always diminishes the quality of the scan, and should therefore be avoided. It can also be accomplished by almost any image editing software, so it doesn't really add to the value of the scanner. Unless you plan to scan line art at very high resolutions (more on that later), ignore claims of interpolated resolution.
Bit Depth:
When a scanner converts something into digital form, it looks at the image pixel by pixel and records what it sees. That part of the process is simple enough, but different scanners record different amounts of information about each pixel. How much information a given scanner records may be measured by its bit depth. The simplest kind of scanner only records black and white, and is sometimes known as a 1-bit scanner because each bit can only express two values, on and off. In order to see the many tones in between black and white, a scanner needs to be at least 4-bit (for up to 16 tones) or 8-bit (for up to 256 tones). The higher the bit depth for the scanner, the more accurately it can describe what it sees when it looks at a given pixel . This, in turn, makes for a higher quality scan.
Most color scanners today are at least 24-bit, meaning that they collect 8 bits of information about each of the primary scanning colors: red, blue, and green. A 24-bit unit can theoretically capture over 16 million different colors, though in practice the number is usually quite smaller. This is near-photographic quality, and is therefore commonly referred to as "true color" scanning.
An increasing number of manufacturers are offering 30-bit, 36-bit or 48-bit scanners, which can theoretically capture billions of colors. The only problem is that very few graphics software packages can handle anything larger than a 24-bit scan, because of limitations in the design of personal computers. When a software program opens a 30-bit, 36-bit or 48-bit image, it can use the extra data to correct for noise in the scanning process and other problems that hurt the quality of the scan. As a result, scanners with higher bit depths tend to produce better color images.
Dynamic Range
Another important criteria for evaluating a scanner is the unit's dynamic range, which is somewhat similar to bit depth in that it measures how wide a range of tones the scanner can record. Dynamic range is measured on scale from 0.0 (perfect white) to 4.0 (perfect black), and the single number given for a particular scanner tells how much of that range the unit can distinguish.
Most color Flatbeds have difficulty perceiving the subtle differences between the dark and light colors at either end of the range, and tend to have a dynamic range of about 2.4. That's fairly limited, but it's usually sufficient for projects where perfect color isn't a concern.
For greater dynamic range, the next step up is a top-quality color Flatbed scanner with extra bit depth and improved optics. These high-end units are usually capable of a dynamic range between 2.8 and 3.2, and are well-suited to more demanding tasks like standard color prepress.
The CCD sensors used in less expensive scanners have a smaller dynamic range than the photomultiplier tubes used in the high-end Drum scanners used for commercial prepress work. This can lead to loss of shadow detail, especially when scanning very dense transparency film. Where scanners have the most problem is usually extracting detail from the darkest parts of transparencies. Scanner vendors frequently report a DMAX number with is the maximum optical density the scanner is capable of distinguishing from solid black.
Density is a logarithmic scale, so a density of 4.0 means that only 0.0001 of the light (or 0.01%) passes through the film. Transparency film typically has a DMAX of around 4.0, so a scanner with a DMAX of 3.4 will lose some deep shadow detail.
While a high dynamic range is no guarantee of good scanning results (many other factors come into play), it is generally an indication that the scanner manufacturer is striving to please educated buyers by producing a higher-quality product. All other things being equal go with the scanner that offers the higher dynamic range.
What type of film gives the best scan results?
Debates over what film type is best for scanning are endless, but scanning the original film is always preferable to scanning a print made from the film.
Film Grain
The finer the film grain, the higher resolution image you will be able to scan. Scanning coarse grained film at high resolution imparts a disagreeable, lumpy texture to the image which is difficult to remove.
One technique for removing graininess from a scanned image is to use Blur tool with a Radius about the size of the grain and a relatively low Threshold value. This will help to blur out most of the low level noise from the film grain without sacrificing too much of the detail in the underlying image.
Slide or Negative film, which is better?
Each film type has its unique advantages and is capable of producing high quality results. As a rule, color slide film is contrastier than color negative film. So if you are photographing a subject with a wide dynamic range, you can easily exceed the exposure latitude of the film. On the other hand, color negative film compresses the contrast range of the scene which makes it a better choice for capturing a wide range of brightness levels.
But, if you are photographing a low contrast subject with color negative film, the resulting contrast range may be reduced so far that the scanning process cannot recover subtle tonal variations. Thus for very high contrast subjects, color negative film is usually better and for very low contrast subjects color positive film may be the best choice.
The biggest difficulty when scanning slide film is loss of shadow detail. Very dense slides let so little light pass through that only the most expensive Drum and slide scanners can measure it accurately. When shooting slide film for scanning, avoid deliberately underexposing the film to heighten colors as this will aggravate the loss of shadow detail and you can easily increase the saturation digitally after scanning the image.
Color negative film has a different set of problems. Because color negative film compresses the dynamic range of the scene into a smaller range of film densities and also because of its orange masking layer, large parts of the scanner sensitivity range goes unused and the image data must be expanded considerably to recover a properly color balanced image with rich blacks and pure whites. The necessary amplification of the image data makes the resulting scans significantly noisier than scans of equivalent color slide films, showing up as increased graininess in areas of solid color such as clear blue skies and a certain lack of smoothness in the overall tonal range. Color fidelity from color negative films is also harder to achieve due to the lack of a visual reference.
As a rule, fine grained transparency films such as Fuji Velvia or Provia 100F yield the highest quality results if you can live with their limited contrast range, if you don’t underexpose it, and if you have a good enough scanner to extract acceptable shadow detail.
Understanding DPI and pixel dimensions
There are three different ways to describe a digital image’s resolution that essentially mean the same thing: (1) total pixel dimensions, (2) DPI at a certain digital image size, and (3) DPI at a certain output size.
The total pixel dimensions of an image will tell you how many total pixels (dots) the image is made up of. For example, we have a digital image that is 1200x1800 pixels (dots). That means our digital image is 1200 dots high by 1800 dots wide. The DPI of a digital image is calculated by dividing the total number of dots wide by the total number of inches wide or by calculating the total number of dots high by the total number of inches high.
For example, we have a digital image that is 1200x1800 pixels (dots) and 4x6 inches in size. That means our digital image is 1200 dots high by 1800 dots wide and 4 inches high by 6 inches wide. Our digital image has 300 DPI.
1800 dots in 6 inch wide = 300 dots in 1 inch = 300 Dots Per Inch = 300 DPIHow much do you need for print?
The best way to determine what resolution you need is to work backwards from the size of the print you want to produce. For most purposes, you will need between 100 and 300 pixels per inch to make a photographic quality print. Below about 150 dpi, the results become noticeably soft; between 200 and 300 dpi the improvement is quite small.
Experience has shown that a print with at least 150 DPI will satisfy most people (the image will look sharp) and 300 DPI is the maximum resolution at which we can produce for prints.
In the table below, the minimum recommended file size will make a photographic that has 150 DPI and the maximum recommended file size will make a photographic print that is 300 DPI.
| File size for printing 300 DPI | File size for printing 150 DPI | Print size, cm | Print size, inch | .No |
| 1200x1800 | 600x900 | 10x13 | 4x6 | 1 |
| 1500x2100 | 750x1050 | 13x18 | 5x7 | 2 |
| 2400x3000 | 1200x1500 | 20x25 | 8x10 | 3 |
| 2550x3300 | 1270x1650 | A4 | 8.5x11 | 4 |
| 2400x3600 | 1200x1800 | 20x30 | 8x12 | 5 |
| 3300x4200 | 1650x2100 | 28x35.5 | 11x14 | 6 |
| 3600x5400 | 1800x2700 | 30x45 | 12x18 | 7 |
| 4800x6000 | 2400x3000 | 40x50 | 16x20 | 8 |
| 4800x7200 | 2400x3600 | 40x60 | 16x24 | 9 |
| 6000x7200 | 3000x3600 | 50x60 | 20x24 | 10 |
| 6000x9000 | 3000x4500 | 50x70 | 20x30 | 11 |
| 4800x9600 | 2400x4800 | 40x80 | 16x32 | 12 |
| 4800x14100 | 2400x7050 | 40x120 | 16x47 | 13 |
| 7200x14100 | 3600x7050 | 60x120 | 24x47 | 14 |
| 7200x21000 | 3600x10500 | 60x180 | 24x70 | 15 |
According to the table, if you want a 12x18 photographic print with a 300 DPI, you would want to use a file with 3600x5400 pixels.
(12x18) x 300 = (12x300) x (18x300) = 3600x5400
References:
Scanners and How to Use Them Written by Jonathan Sachs
Wikipedia: Scanners

